


Cover Image @ Tomas Jacques
Hopefully one day you might be lucky enough to take an animal worthy of sending to the taxidermist, so it's a good idea to learn about caping before you inevitably stuff it up.
A special thanks to David Jacob's for his input and numerous images in this article. David is the latest of four generations of taxidermists so certainly know's his stuff, and we are all lucky that he's passing on this knowledge.
Have a look at his Website and Facebook page for more information and some fantastic examples of his work.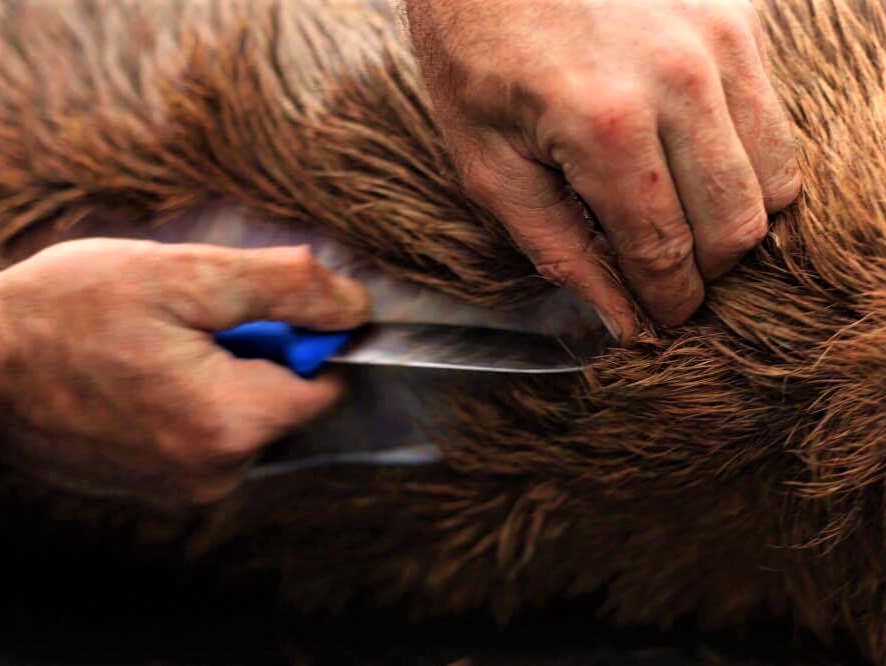
David is our local taxidermist and mentioned to me that just the other day he had 3 different people come in on the same day that had all cut their capes too short, and the dissapointment these customers had to deal with. Taxidermists these days are just about magicians, but a short cape is a short cape and they simply have to have enough skin to work with. Hence the motivation for this article. If this person had been shown what to do, it would have saved the disappointment of learning the cape was too short. Especially after carrying out the head and half the neck and no doubt a good amount of meat.
Taxidermists are not concerned about excess flesh or fat on the hide, even the odd hole is OK. But if you don’t have the initial cuts in the right places then that cape is going to be good for nothing. Which must be pretty dam disappointing to hear when dropping that trophy of a lifetime off to the taxidermist.
Taxidermists keep a good stock of replacement capes for such instances but it does add unnecessary expense to the mounting cost. If you try to get a replacement cape for yourself or a mate, it may not be a suitable fit for the antler pedicles or if its taken later in the season it might not reflect the original animal you've shot.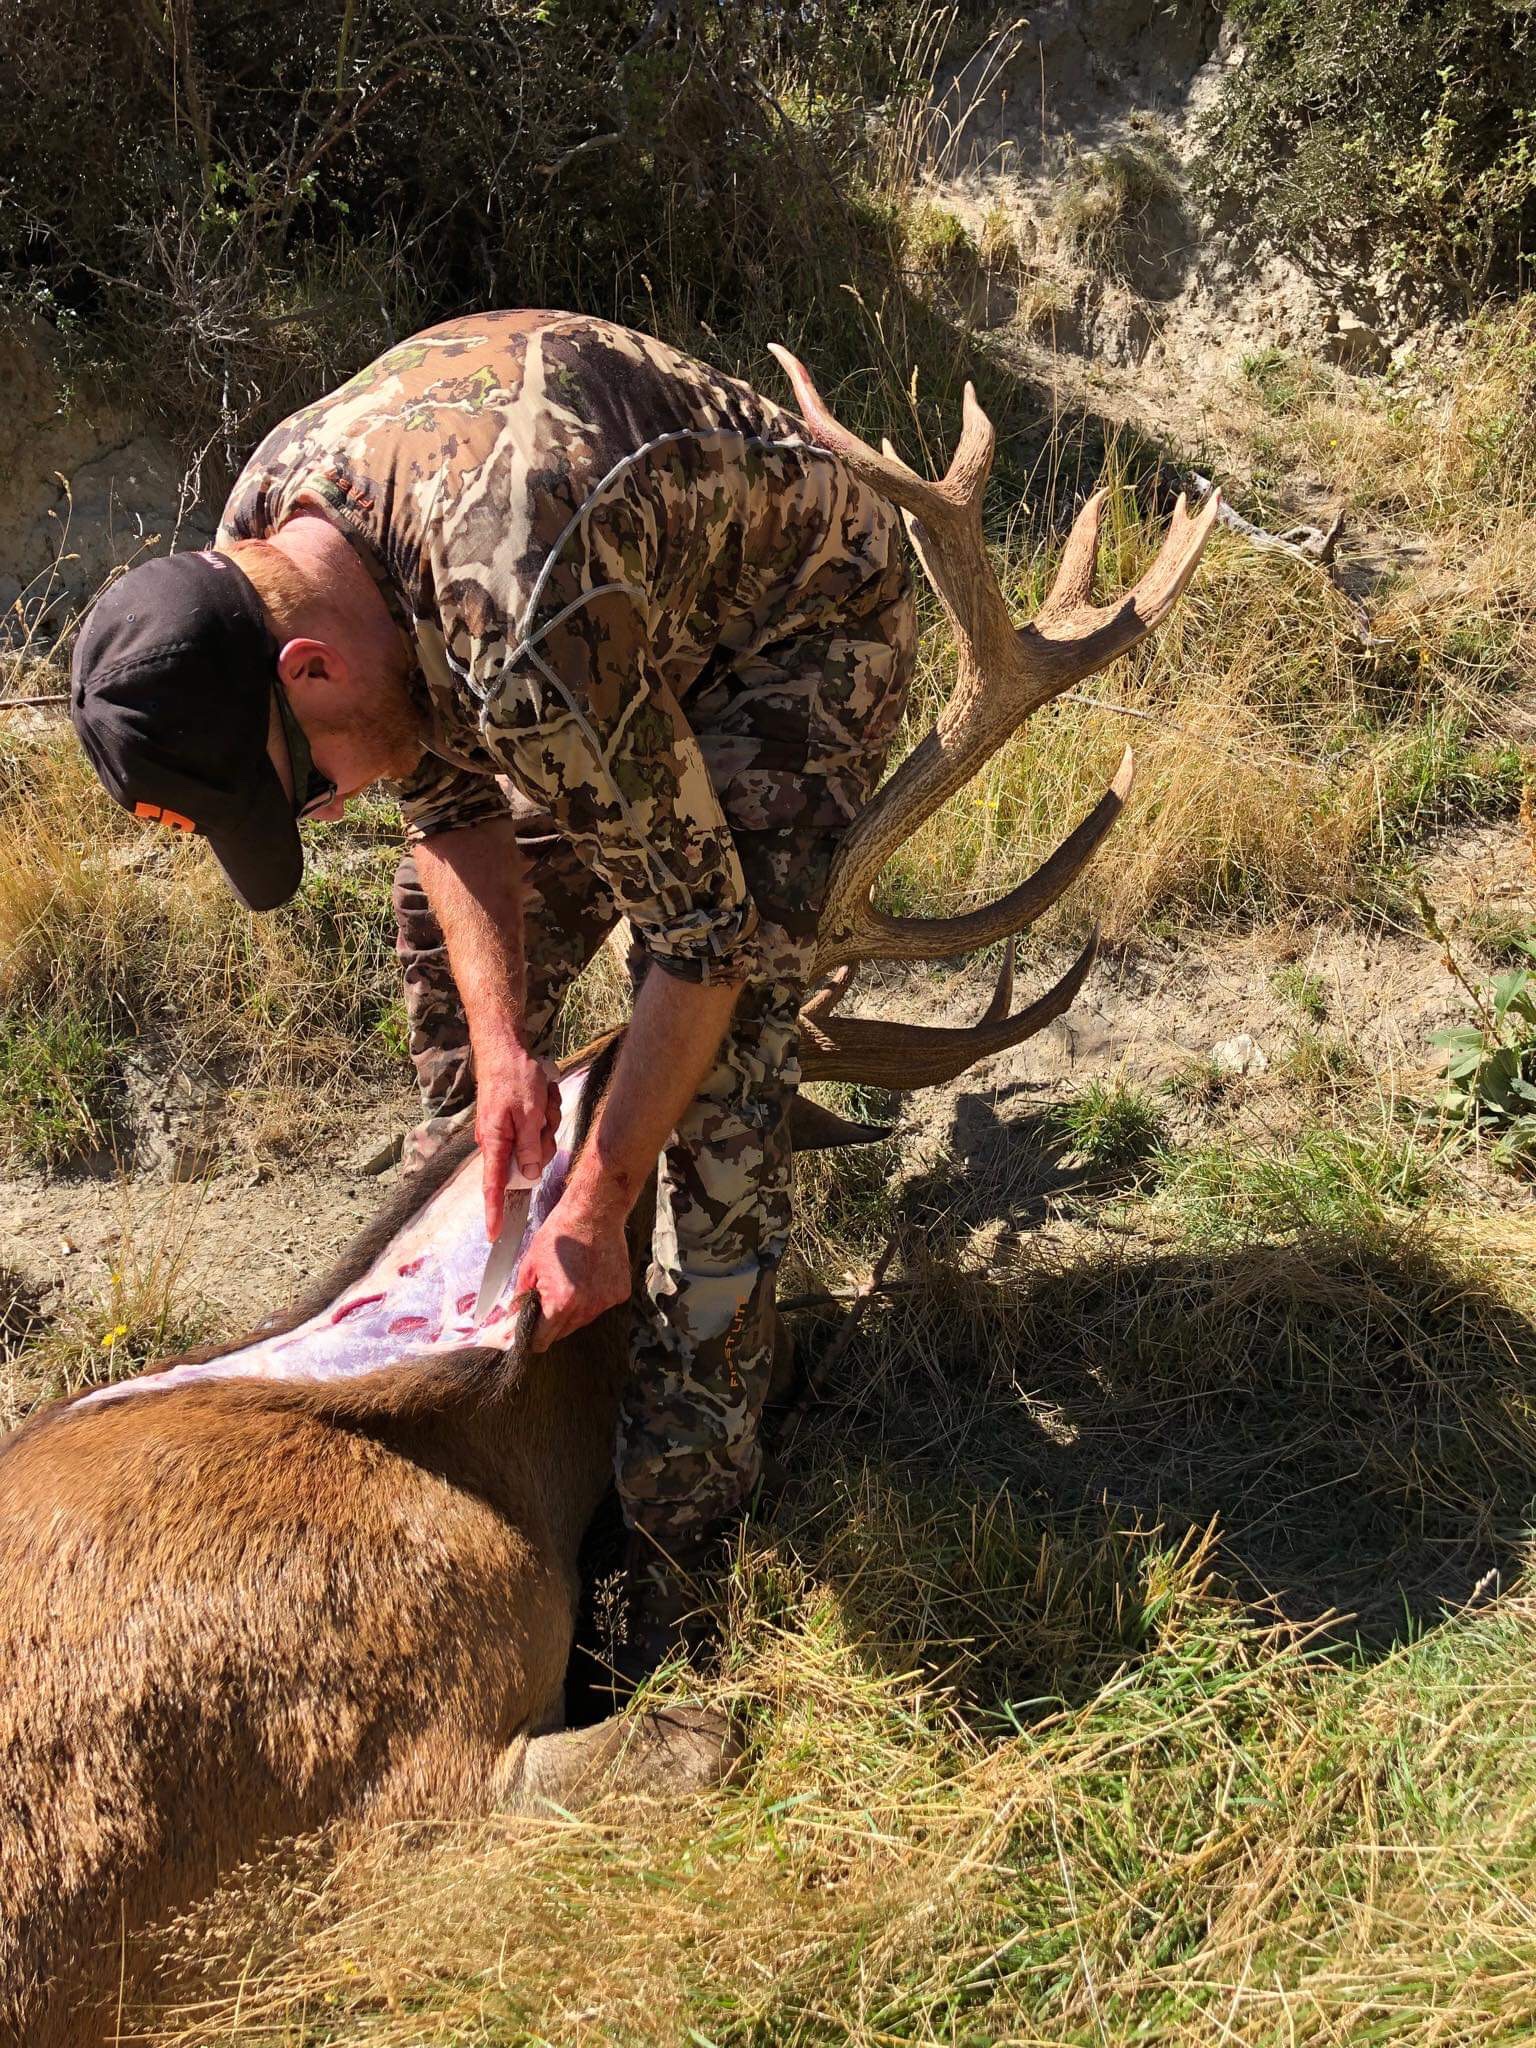 Sam Manson on the job
David will also take capes to use against a deposit for future taxidermy work, but unless it's a cull animal discourages shooting animals just for this purpose.
Now they say there’s more than one way to skin a cat, but whichever way you look at it the initial cuts need to provide enough skin to work with.

Courtesy of David Jacobs
The above illustration shows where these cuts need to be, and the minimum length down the body needed by the taxidermist.
1- Always cut the skin with the blade facing upwards, the idea here is to just be cutting the skin and not the hair itself.
2- Make all these cuts as smooth and as straight as possible. Follow the natural black hair line down the center of the back of the neck on most animal species. The exception is winter chamois and tahr where you want to be a half an inch to one side of where the hair naturally parts, so the stitching will not show on the finished mount. And always cut away from yourself!
3- If you’re unsure about length then just take more than you think you need! A good guide here is to just always take the skin back as far as the pizzle, and go just past the point where you would usually take the hock off an animal. This is of course for a shoulder mount.
4- If you are unsure about how to deal with the legs you can sock them, this is more time consuming but your not cutting the skin so you can't really stuff it up.
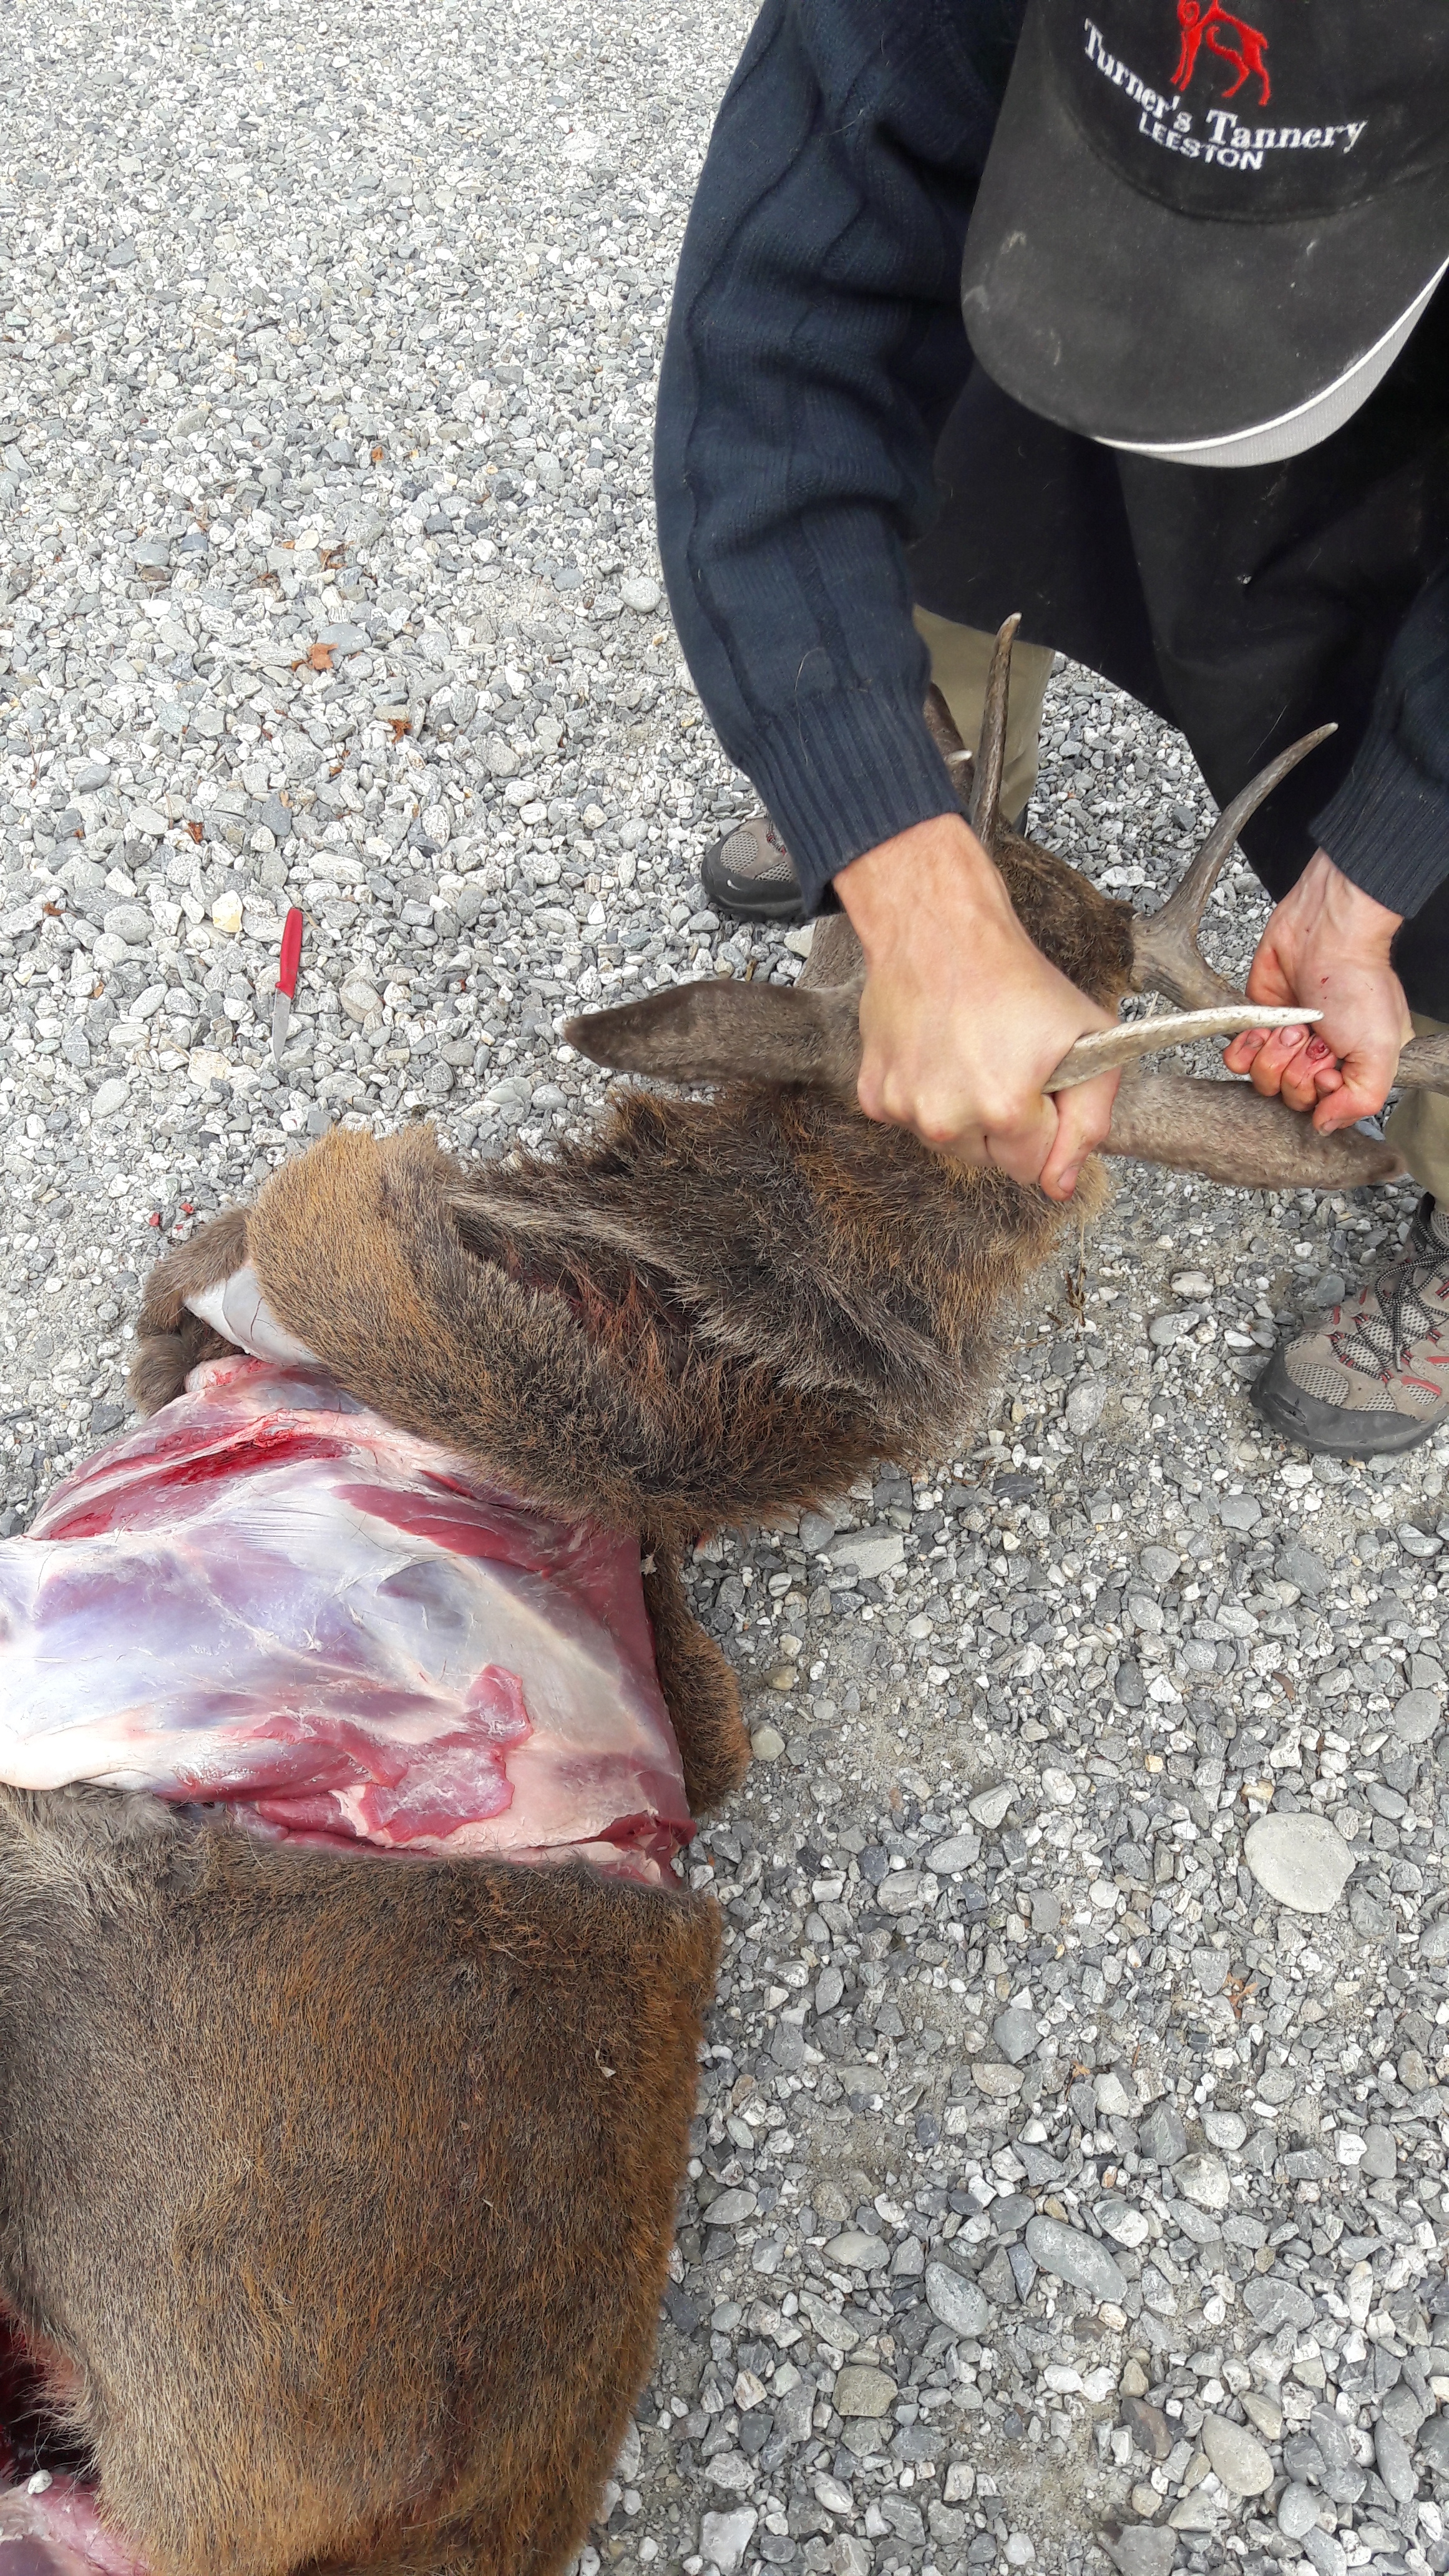
Now you’ve got the cuts right start knifeing the skin off from the cut you’ve made down the centre line of the back. The less schnitzel left on the skin the better so take your time and make sure you’re taking off just the skin and not all those tiny muscle layers between the skin and body, which interestingly are used for the animal to shiver/shake.
Once you get to a certain point you can start to “punch” the skin off the animal. but watch out for sharp broken bone around the bullet holes especially the exit hole. Simply hold the skin and start driving your fist between the skin and body. On a stag you can usually punch the flanks and down in around the belly, with Chamois being quite thin skinned you can actually punch quite a bit of the skin off. Tahr can be a pain and you will generally have to knife off the whole skin off. The brisket area is particularly tough as this is the thickest part and insulates the body where he lies on the snow. Caped out and ready to go. @Luke Potts
There’s a few ways to make the cuts to get the skin off around the front legs. Personally I make a cut all the way up the back of the front leg to just slightly past the elbow. From this cut you can skin until the leg is free. Then once you’ve punched/skinned down low enough from the cut down the back to join up with your leg skinning, simply pass the hoove through the hole you’ve created and carry on skinning your way around the brisket and neck. You’ll see from the below video that Joseph Peter from Hard Yards Hunting has a slightly different way of dealing with this. Both work great, just be sure to keep your cuts nice and straight and often your cut on the back of the front leg can follow along a colour change in the hair.
Joseph does this for a living and has caped out hundereds of animals over a wide range of species, so it's worth paying attention to this demonstration. It's also worth following his Facebook Page for a constant feed of epic hunting photo's and video's
Especially with stags it’s really helpful to have your mate helping out with holding up legs and moving the animal around. For larger animals it is easiest to skin one side first then flop the skin back over to protect the meat and stop debris such as leaves, dirt or stone's getting on both the hide and meat, then roll him over and do the other side.
Once you’re at the point of thinking you can start to take the head off, it’s then time to slow down! This is often the point where people slip and end up going through the cape. What you’re aiming for is to take the head off at the Atlas joint. This is located at a height pretty much exactly between the ears. It can be a little hard to find for people at first, but once you do you will realise why it’s called the Atlas joint. It often helps to tilt the antlers/horns forward and chin down, holding that pressure as you poke around working that joint apart.
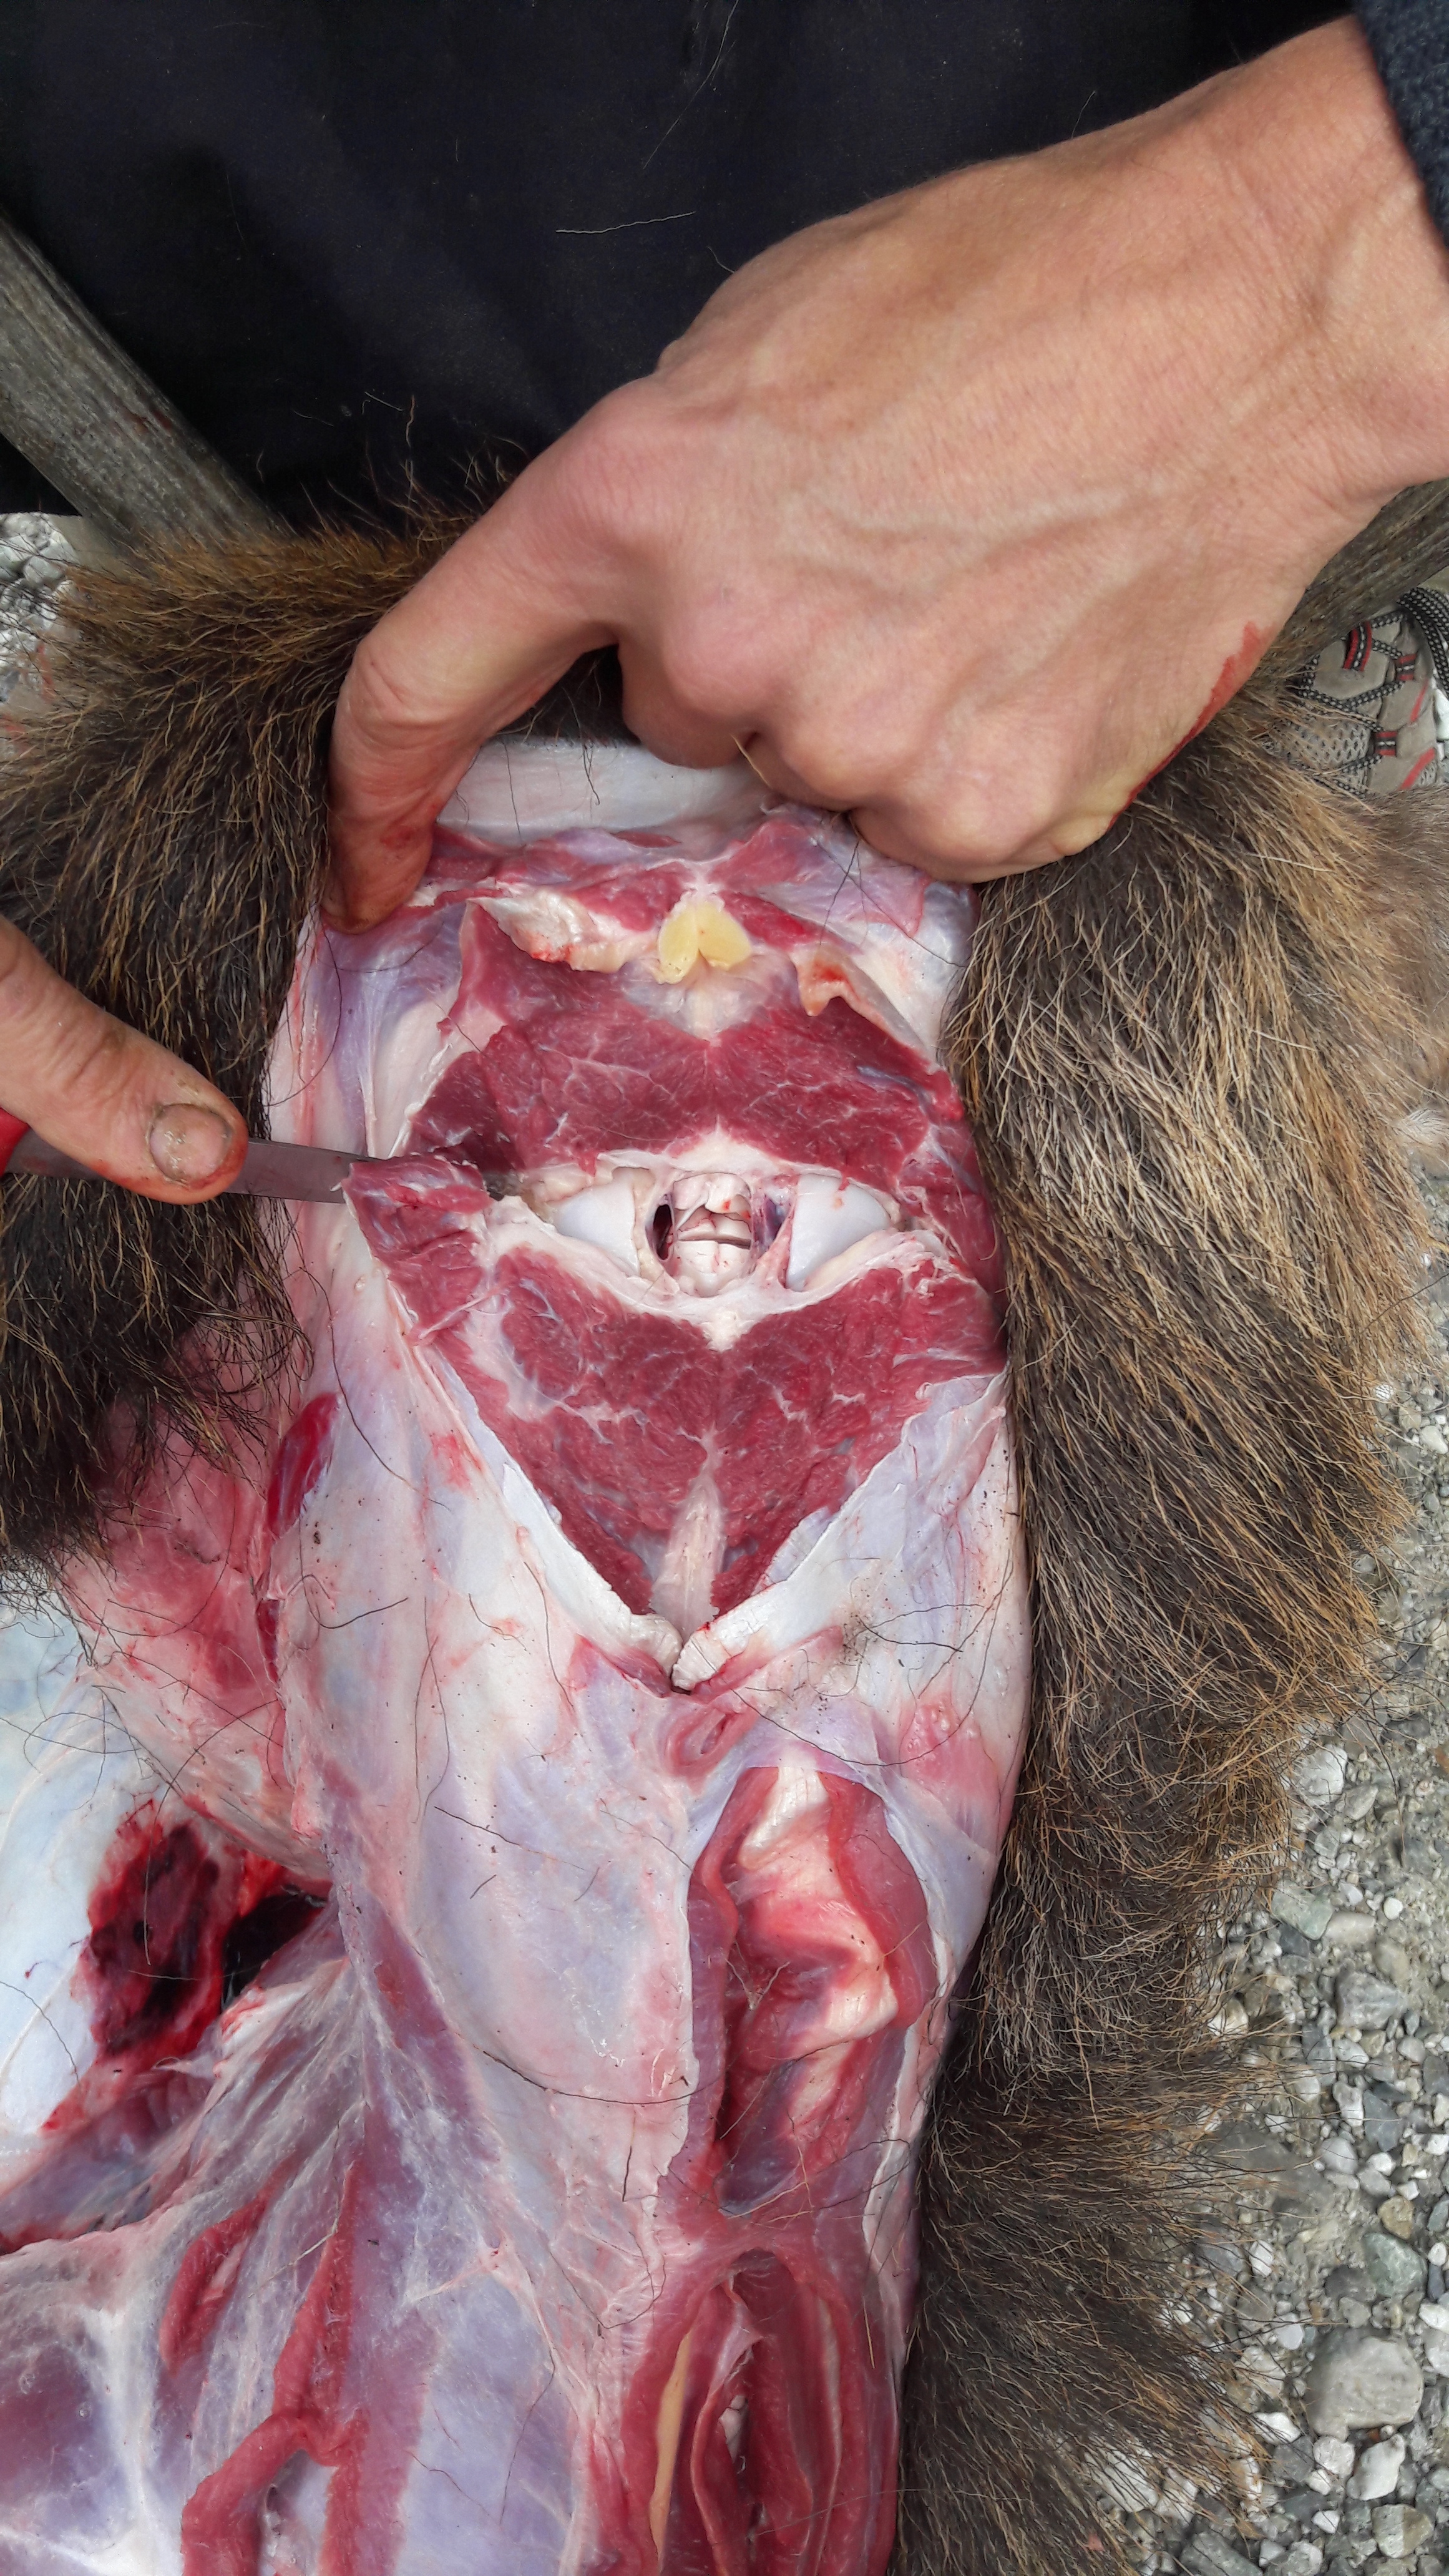 Exposing the Atlas joint. Image @ David Jacobs
Needless to say that through this whole process you want to keep the skin as clean as possible and not covered in dirt or plant material.
 Once you've opened up the joint, a bit of a twist will help. image @ David Jacobs Spread out to cool. image @ Cam
Once you’ve got the cape off you need to spread the whole thing out on the ground for maybe 10 minutes or more (hair down/skin up) to allow it to cool down, this helps prevent hair slip.
Removing the tongue is a good idea (especially before photo's) as gut fluid can get trapped under it and cause localised hair slip.
Fold that cape skin to skin then roll/fold it up and pack it out of there. Davids tip here is to not wrap the cape around the head and trap the heat in. Instead use cable ties or some string to attach the cape to the inside of one beam of the antler. Providing extra padding for packing out over your shoulder. As well as no blood down the back of your neck, you can swap the antler from right to left shoulder as the terrain dictates. This means the antlers are less likely to get caught up on vegetation and you are less likely to be mistaken as a deer. Also leaving the other hand free for your rifle, hill-stick or ice axe.
When you return to the truck or hut don’t leave it sweating away in a plastic bag. A mutton cloth is ideal to keep flies, wasps, kea's or vermin off. The goal is to get it straight into the chiller until it can be head skinned and turned then frozen.
If you are a dedicated trophy hunter then it is important to get it to the taxidermist as soon as practical as temperature effects the bacterial growth. The warmer the temperature the faster the bacteria will grow and cause “hairslip” which is the irreversible loss of hair. As a guide David put together the following recommended time frames for the time between when the hide is removed from the carcass and delivered to the taxidermist or a freezer.
40 Degrees - 1 Hour
30 Degrees - 4 Hours
20 Degrees - 8 Hours
10 Degrees - 24 Hours
5 Degrees - 72 Hours
Most taxidermists prefer you bring in the head unskinned so they can record information and take measurements particular to your trophy and ensure that the intricate process of head skinning is done correctly.
Image @ CamIt’s worth noting that Chamois have glands at the base behind their horns. It’s super important not to cut through or between these, we will cover this some more when we eventually get around to a follow up article on head skinning and turning.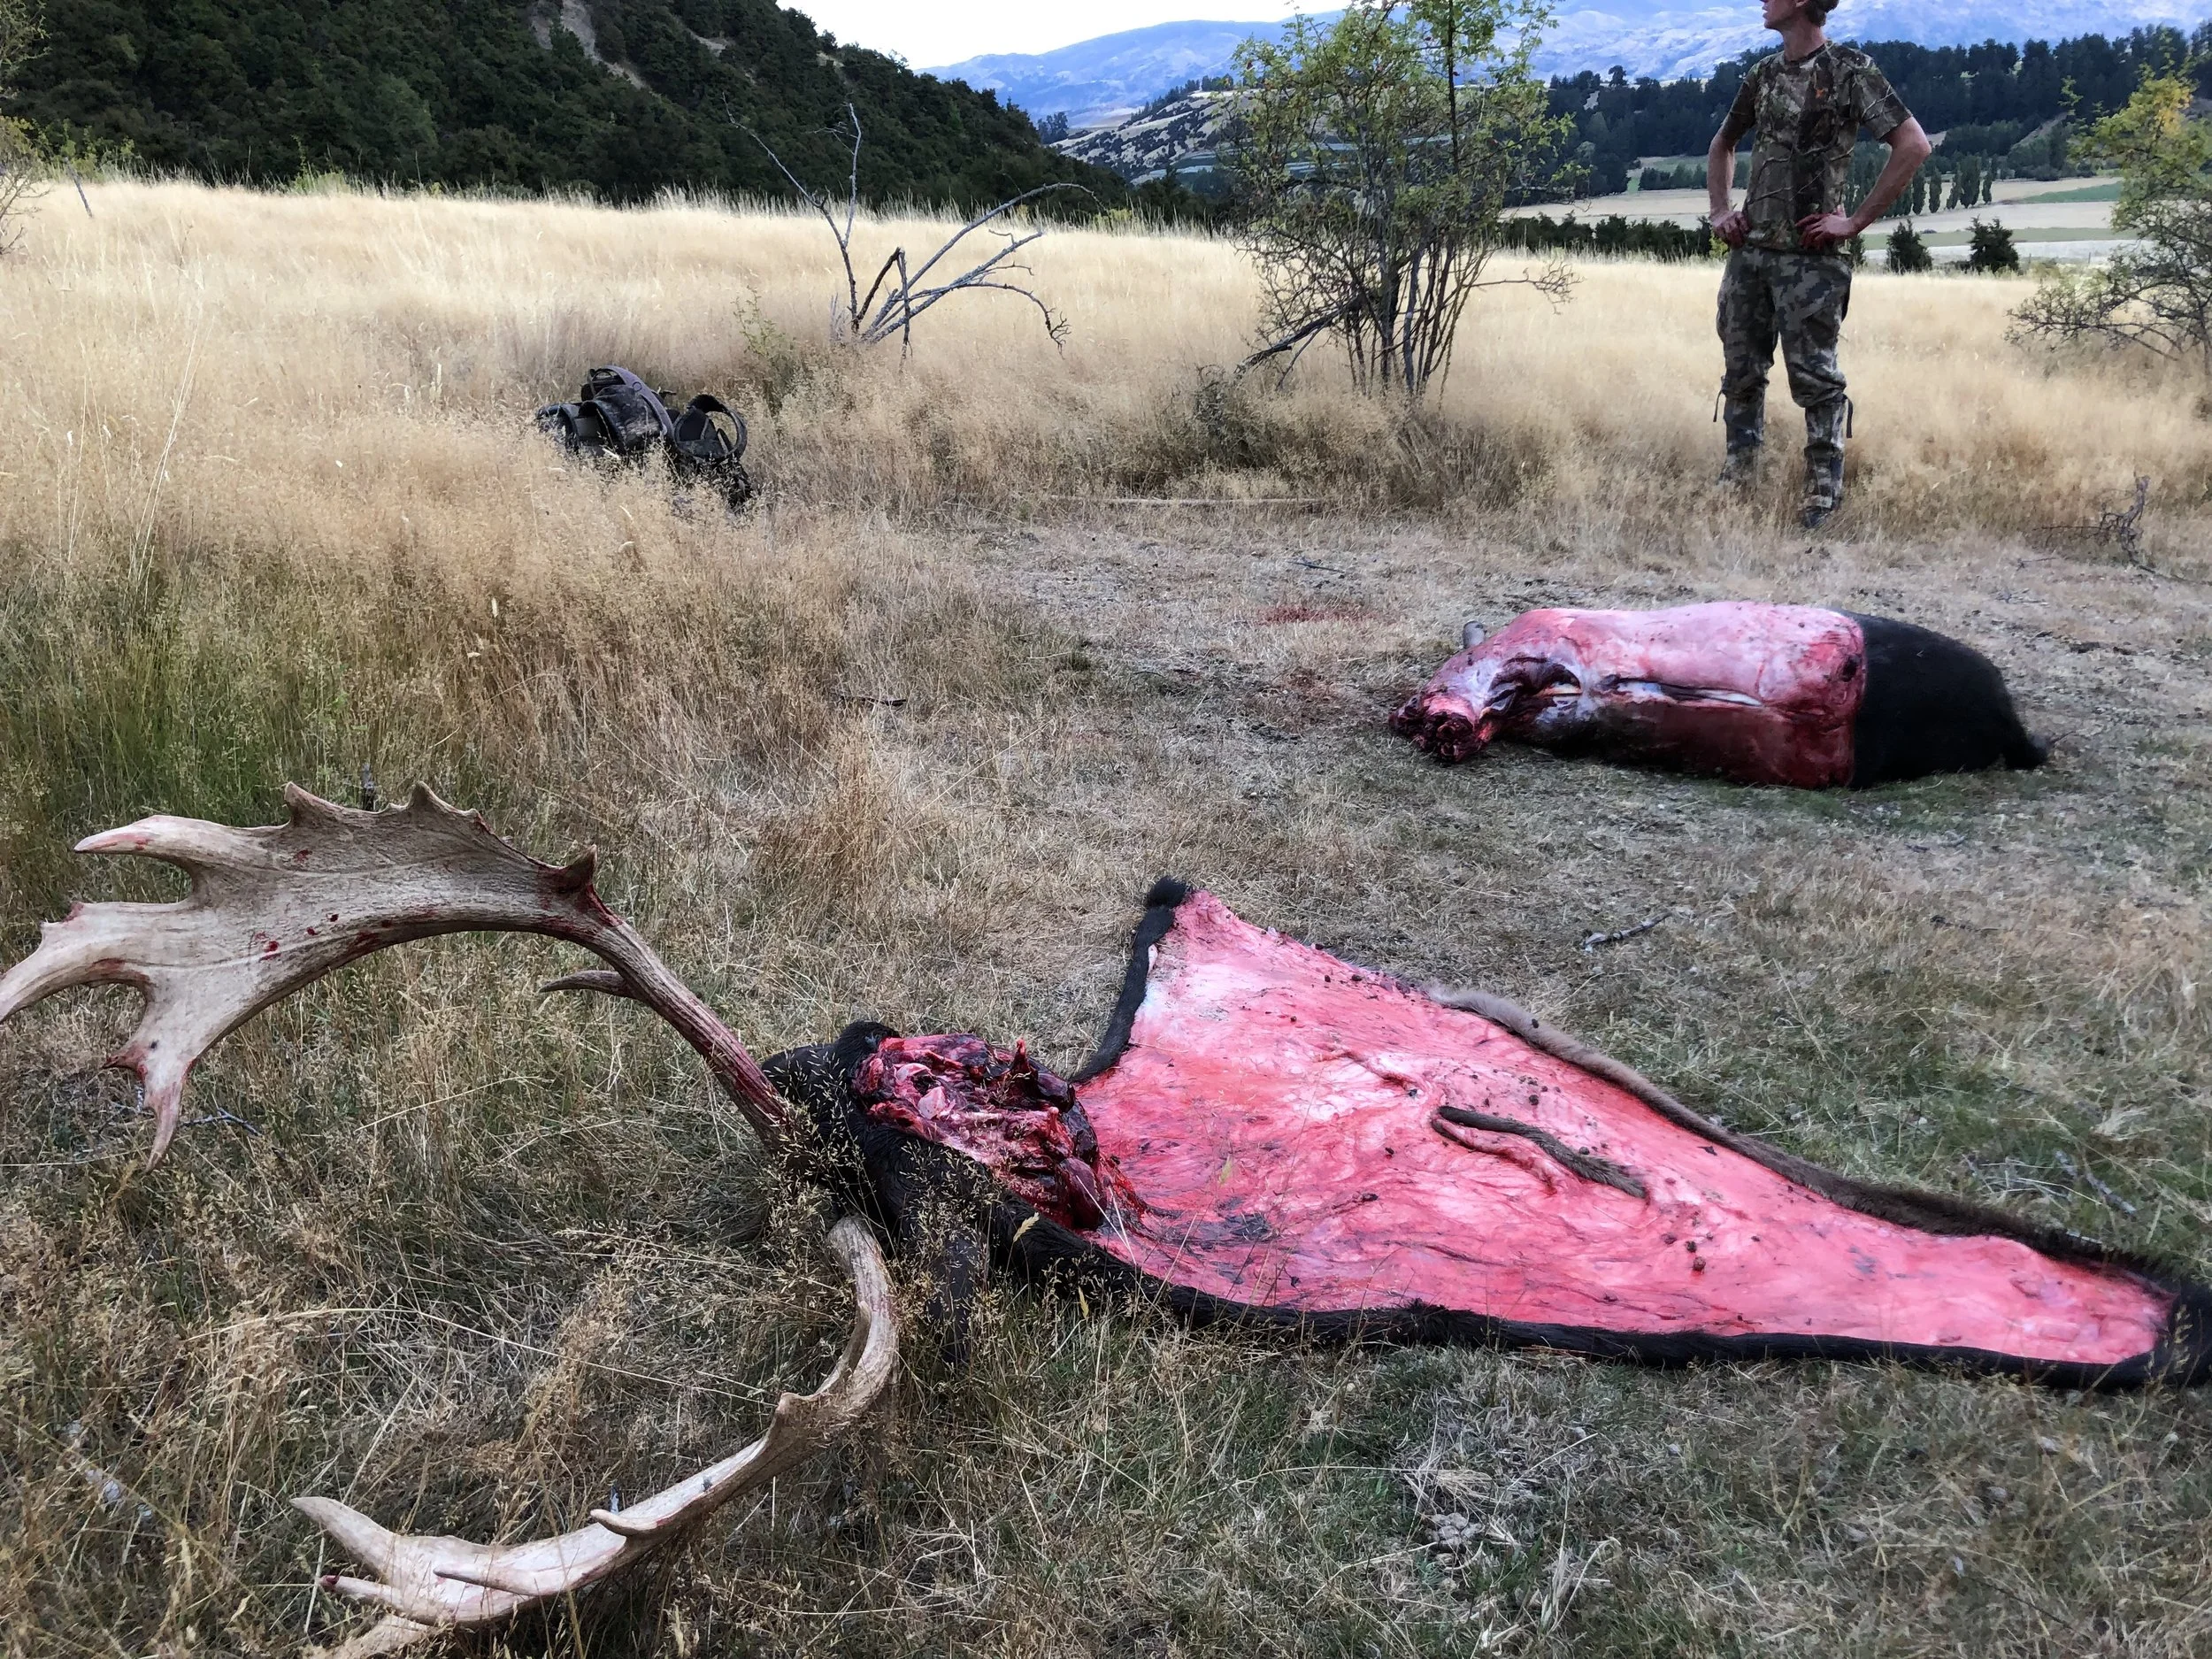
Click here to see the excellent range of R & N Blades, which are ideal for this task
If your unfamiliar with this process then have a practice run on that next meat animal. When you have shot the trophy of a lifetime and are burning daylight, it's not the time to start learning.

Image @ Tomas Jacques, Jono Greer with an awesome Otago stag

As Seen in Issue #81 of NZHunter Magazine